

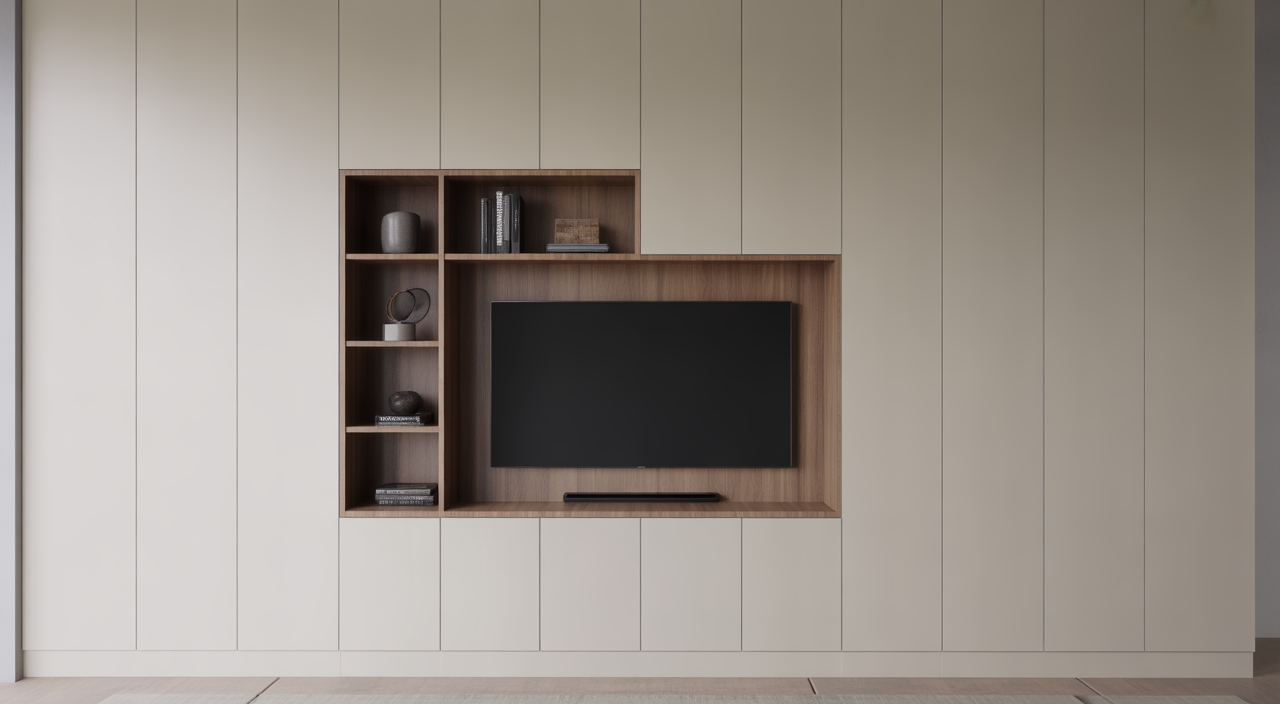
What is a bespoke media wall and how can it transform your home?
A bespoke media wall is a custom-built feature that brings your TV, speakers, storage, and lighting together in one stylish unit. It turns a plain wall into the main highlight of your living room, bedroom, or home cinema. If you want a neat, modern look with no visible wires and everything in its place, bespoke media walls are one of the best upgrades you can choose.
Unlike a regular TV unit, a custom media wall is designed exactly for your space, your devices, and your taste. You can choose every detail, from materials and finishes to shelving layout and mood lighting. For Indian investors and homeowners, it is a smart way to add both comfort and long-term value to your property.
This guide walks you through design, planning, cost, and installation so you can move from “nice idea” to a clear, practical plan.
What is a bespoke media wall?
In simple words, a bespoke media wall is a made-to-measure TV feature wall. It usually includes a TV recess, storage cabinets, shelves, and space for speakers, gaming consoles, and set-top boxes. Everything is built in so the whole wall looks like one clean, continuous design.
Some popular features are:
- Recessed TV so the screen sits flush with the wall
- Hidden cable management so no wires are visible
- Closed storage for clutter and open shelves for decor
- LED strip lighting to create a soft glow around the unit
- Space for a soundbar or full home theatre system
Why choose bespoke over off-the-shelf?
Off-the-shelf TV units are quick and cheap, but they rarely fit your wall perfectly. You often end up with awkward gaps, messy cables, and limited storage. Bespoke media walls use every inch of space and are tailored to your exact needs.
Key benefits include:
- Perfect fit: Ideal for tricky corners, long walls, or rooms with columns or niches.
- Better organisation: Built-in shelving units for books, decor, and personal collections.
- Clean look: Wires, routers, and devices are hidden yet accessible.
- Higher property appeal: A premium feature that can impress buyers and tenants.
Planning your bespoke media wall
Before talking to a carpenter or interior designer, it helps to be clear about what you want the wall to do. This reduces changes later and keeps your budget under control.
Assess your space and AV needs
Start with a quick checklist:
- Measure wall width, height, and ceiling level.
- Note the position of doors, windows, and sockets.
- List all devices: TV size, speakers, soundbar, gaming console, streaming box, set-top box.
- Decide if you want room for decor pieces, books, or family photos.
For a comfortable viewing experience, the ideal TV viewing distance is usually 1.5 to 2.5 times the diagonal size of your TV. So for a 55-inch TV, aim for around 2.1 to 3.4 metres between sofa and screen.
Materials and finishes: what to choose?
The main structure is often built from MDF or plywood, then finished with laminate, veneer, or paint. Here is a simple comparison:
- MDF: Smooth, good for painted finishes and detailed designs. Works well in dry rooms.
- Plywood: Stronger and more moisture resistant. Good choice for long units and heavy loads.
- Laminate: Hard-wearing, easy to clean, available in many colours and textures, including wood look.
- Veneer: Thin layer of real wood on top of MDF or plywood, giving a rich, natural look.
For a sleek, modern style, many homeowners choose matt laminates in neutral colours with a few open shelves in warm wood tone. If you want to learn more about picking the right substrates and finishes, this guide on how to choose materials for custom media walls is a helpful extra resource.
Budgeting and cost ranges
Costs vary by city, material quality, and design complexity, but you can think in three simple levels:
- Low budget: Basic MDF structure, laminate finish, open shelves, simple cable channels. Ideal for compact flats.
- Mid-range: Mix of closed cabinets and open shelves, better hardware, soft-close hinges, integrated LED lighting, space for a soundbar.
- High-end: Large feature wall, premium veneers or high-gloss finishes, full home cinema integration, niche lighting, custom panels, and decorative slats.
For Indian investors, a mid-range solution often gives the best balance between cost and long-term appeal, especially for rental or resale-focused properties.
Design inspiration and trends
Modern minimalist media wall design
Modern media wall design focuses on clean lines and calm colours. Think flat cabinet fronts, handle-less doors, and hidden storage. Use a single accent shade such as deep blue or charcoal around the TV, with the rest in soft white or beige.
Classic built-in shelving styles
If you prefer a timeless look, choose framed cabinet doors, open bookshelves, and warm wood tones. Symmetry works well here: equal shelves on both sides of the TV, with closed storage at the bottom. This style suits larger family living rooms and adds a library feel.
Floating units and accent lighting
A floating media unit is fixed to the wall with free space below. It makes the room look bigger and lighter. Add LED strip lights under the floating unit or around the TV niche for a soft, luxurious glow, perfect for movie nights at home.
Technical integration and installation
AV equipment and cable management
Plan your wiring early. Decide where the main power points, internet router, and set-top box will sit. Use trunking and internal channels so cables run behind the panels and cabinets.
Some tips:
- Keep a service opening behind the TV for future cable changes.
- Provide ventilation gaps for amplifiers, consoles, and routers.
- Use labelled cables so you know which wire goes where later.
DIY vs professional installation
Flat-pack units can be a DIY weekend project, but a full media wall is usually better handled by a professional carpenter or interior contractor. They can align panels neatly, support heavy loads, and coordinate with electricians for safe wiring.
If you like managing projects yourself, you can still save time by following structured guides, such as broader home upgrade and design resources on this detailed lifestyle and home improvement blog.
Typical project timeline
A straightforward bespoke TV wall unit usually follows this pattern:
- Design and approvals: 3 to 7 days for sketches, revisions, and final layout.
- Production: 1 to 3 weeks for cutting, finishing, and pre-assembly at the workshop.
- On-site installation: 1 to 3 days for fixing the structure, doors, and lighting.
Larger, more detailed projects with complex paneling or home cinema features can take longer, so build some buffer into your schedule.
Maintenance, care, and longevity
Cleaning tips
Most media walls are easy to maintain:
- Dust weekly with a soft cloth or microfiber duster.
- Use a slightly damp cloth for laminate or painted surfaces, then dry at once.
- Avoid harsh cleaners on veneer or natural wood; use wood-friendly polish if needed.
Repairs and touch-ups
Small scratches on painted MDF can often be fixed with matching touch-up paint. Loose hinges or drawer runners can be tightened with simple tools. For major damage or electrical issues, call your original installer so warranty and safety are not affected.
FAQs about bespoke media walls
Q1. How long does it take to get a bespoke media wall installed?
For a typical living room media wall, expect 2 to 4 weeks from design confirmation to final installation. The actual work in your home is usually quite fast, often completed within a few days, which keeps disruption low.
Q2. Can I upgrade my existing TV unit to a full media wall?
Yes, in many cases your current TV and devices can be integrated into a new structure. Your designer will measure your equipment, reuse what still fits, and create extra storage and wiring routes around it.
Q3. Are bespoke media walls suitable for rental properties?
They can be a very smart choice for high-end rentals or serviced apartments. A clean, built-in entertainment center makes the flat feel premium and helps justify a higher rent, while keeping the space organised and easy to maintain.


